Final Fantasy XIV: Stories from the Regulars
Posted on Tue 24 October 2017 • Tagged with Stories, Video Games
I’ve been playing Final Fantasy XIV (FFXIV) for more than half a year now. I can say without doubt that I have yet to run out of interesting stories to experience. The game is just so packed full with activities and seemingly none of them come without their own stories and lore.
After you have progressed to a certain point in the story, you can develop relations with beast tribes in the game, earning their respect and helping them develop their society. There is a long quest chain revolving around clumsy inspector Hildibrand Manderville. Even progression for gathering and crafting is involved with their own quests and stories.
I will not deny that there is a bit of stretch between patches when you have completed all that is to the current main story. I don’t think you can really prevent that while ensuring that the quality of the main story is top notch. Releasing too often might have the quality of the writing and the setting suffering and I most certainly do not advocate that tradeoff.
Let me tell you another chapter of Kakysha Saranictil’s story. Last time I told you about her role in the liberation of Doma and Ala Mhigo. Kakysha has not been idle for long even though she managed to sneak in a little vacation at the Rhalgr’s Reach holiday resort with Deithwen Addan, a long time friend.

She was pleasantly surprised when Jenji Seraph also popped in. Images worthy of post cards were taken. “Wish you were here!”, to send home to other people in the Free Company.

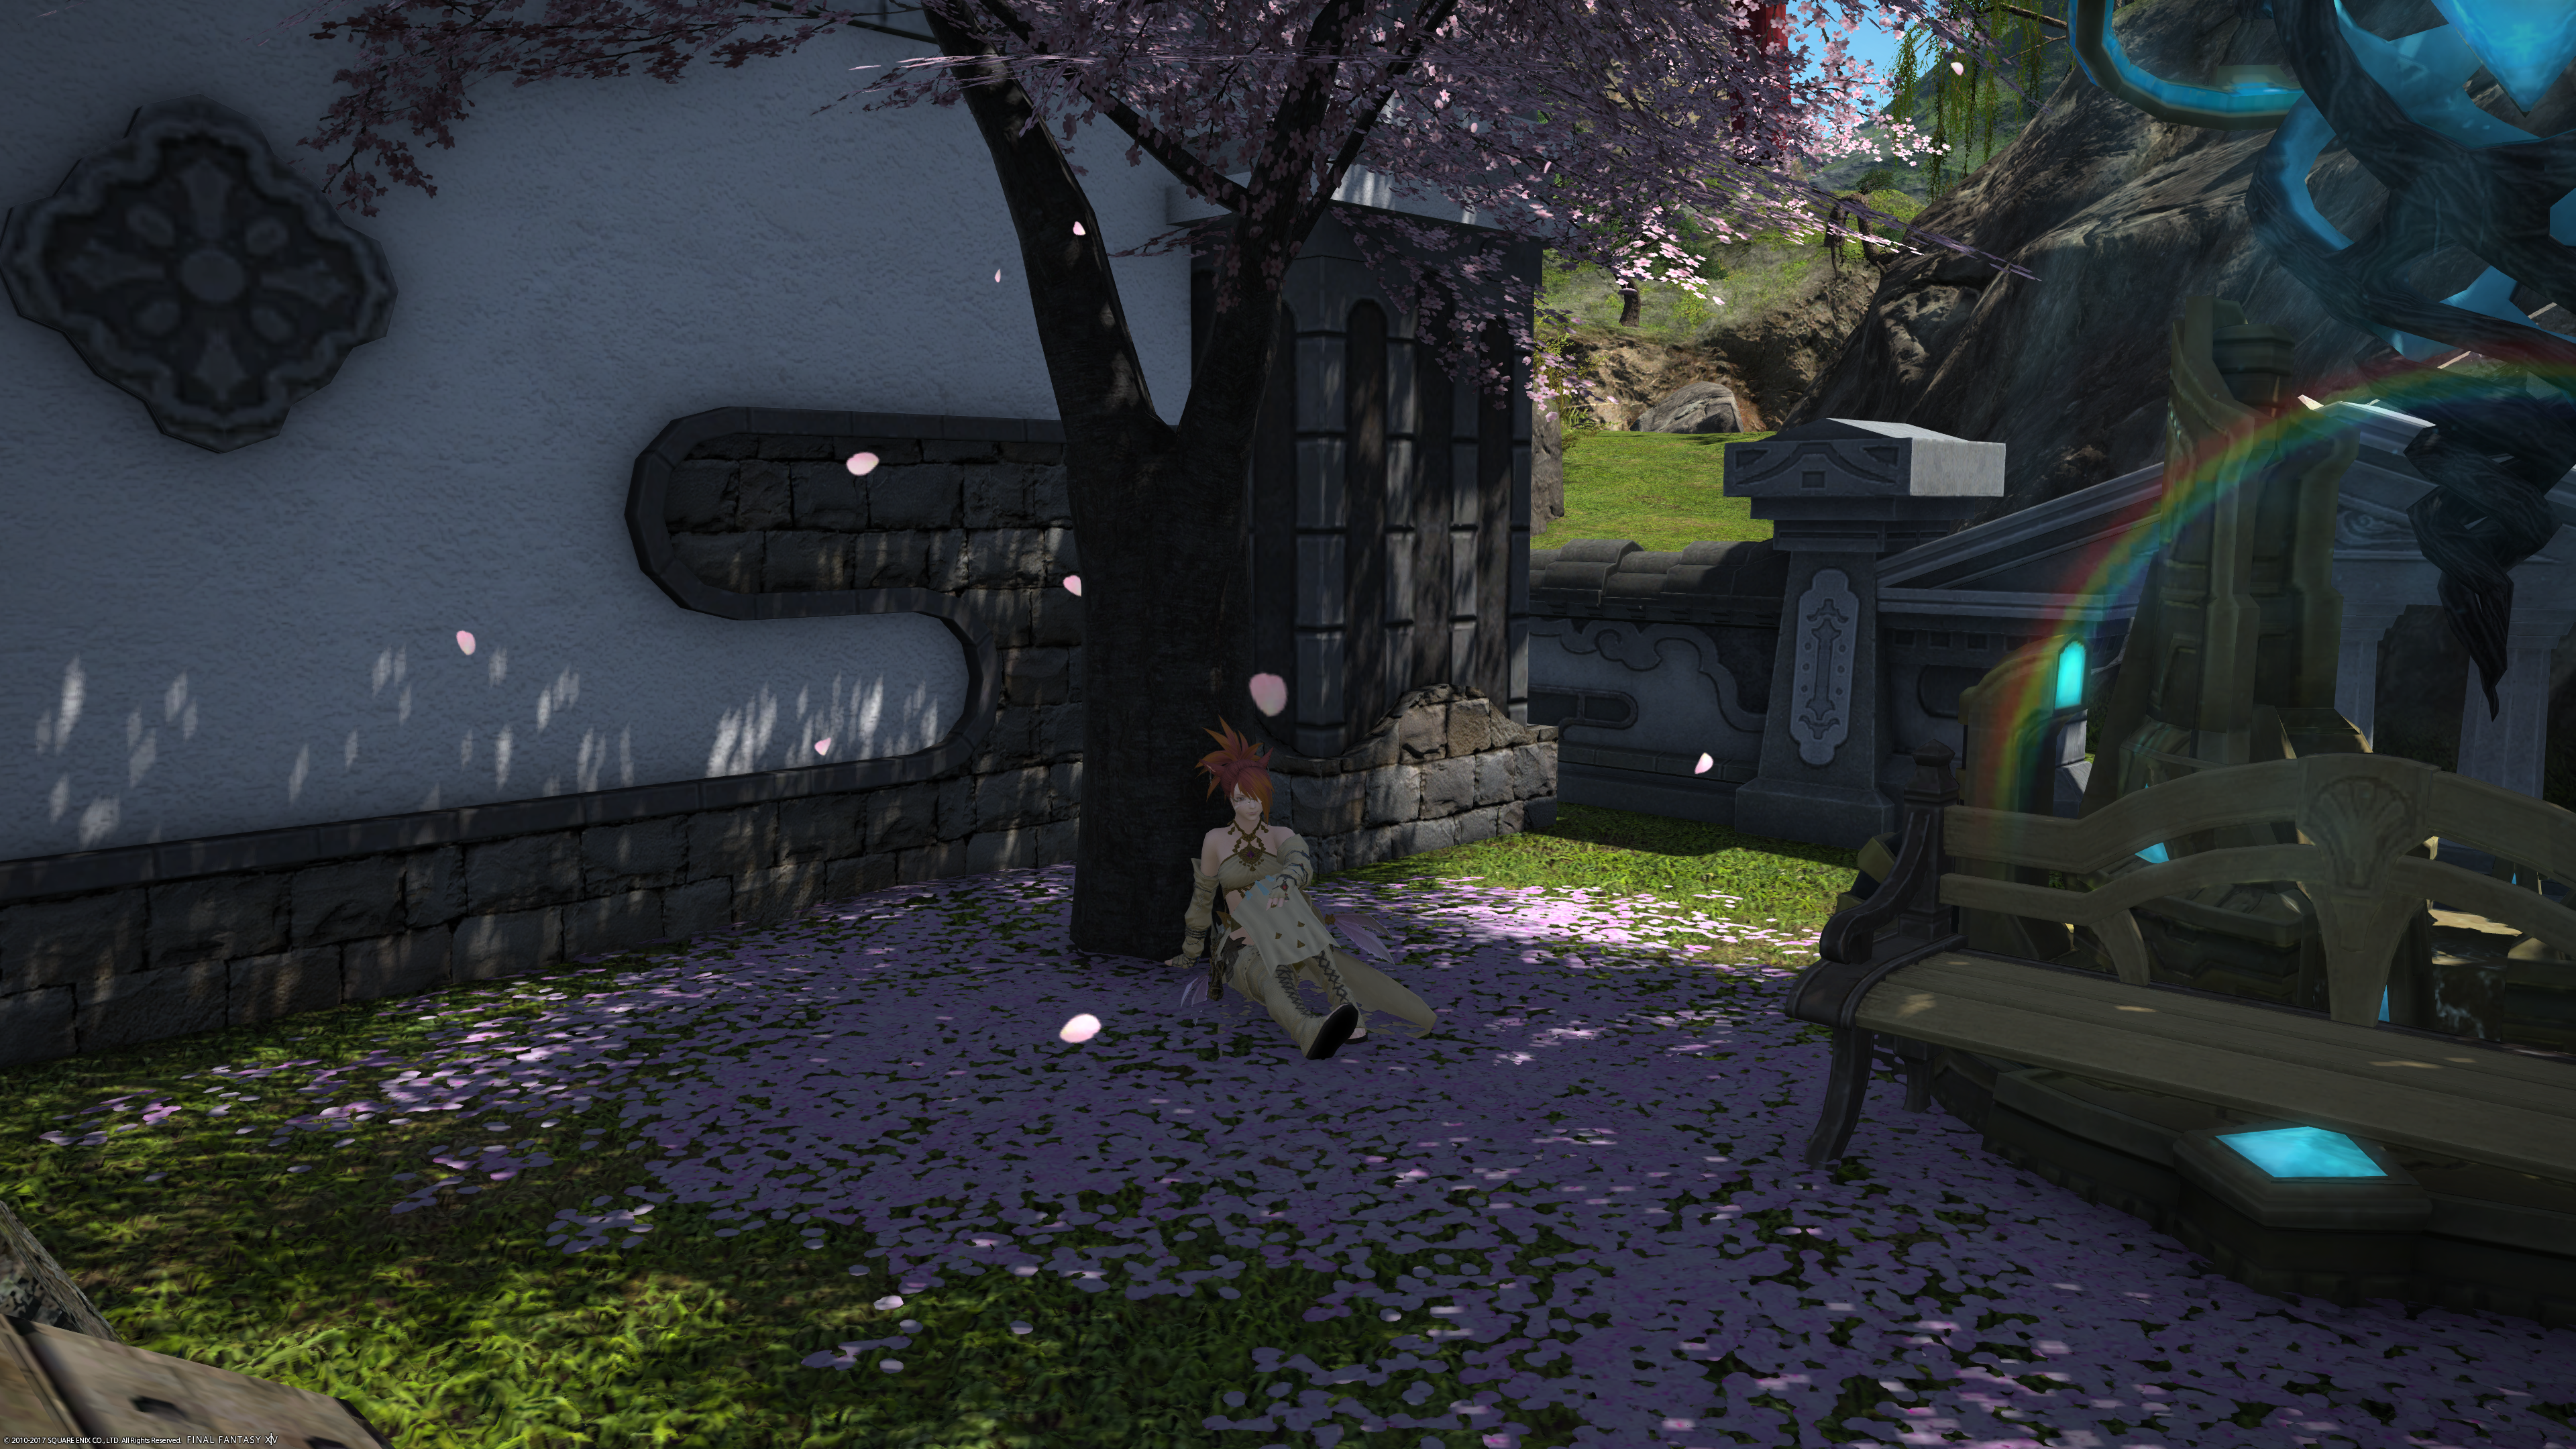
Between helping with the efforts of rebuilding Ala Mhigo, she was helping out the Kojin beast tribe - a people of bipedal turtles - coming to terms with the conflict between the red and the blue faction of their people. She had some very busy weeks heading more into diplomacy and getting an understanding of more beast tribes. She reached an understanding with the Sahagin, fish people of La Noscea. She helped the colony of Vath, bug people of the Dravanian Forelands. She danced with the Vanu, bird people of The Sea of Clouds and even spoke to the Kobolds, who are mine dwellers of La Noscea. All that running around left her pretty exhausted but she found a serene place to relax in the newly arranged garden of her Free Company.
Kakysha tried to branch into a few more different activities, like learning the Gladiator class and improving her fishing skills. Furthermore she’s been on a few expeditions to Rabanastre, not all of which have been entirely successful. She met Deithwen again when exploring the desert for places to fish.

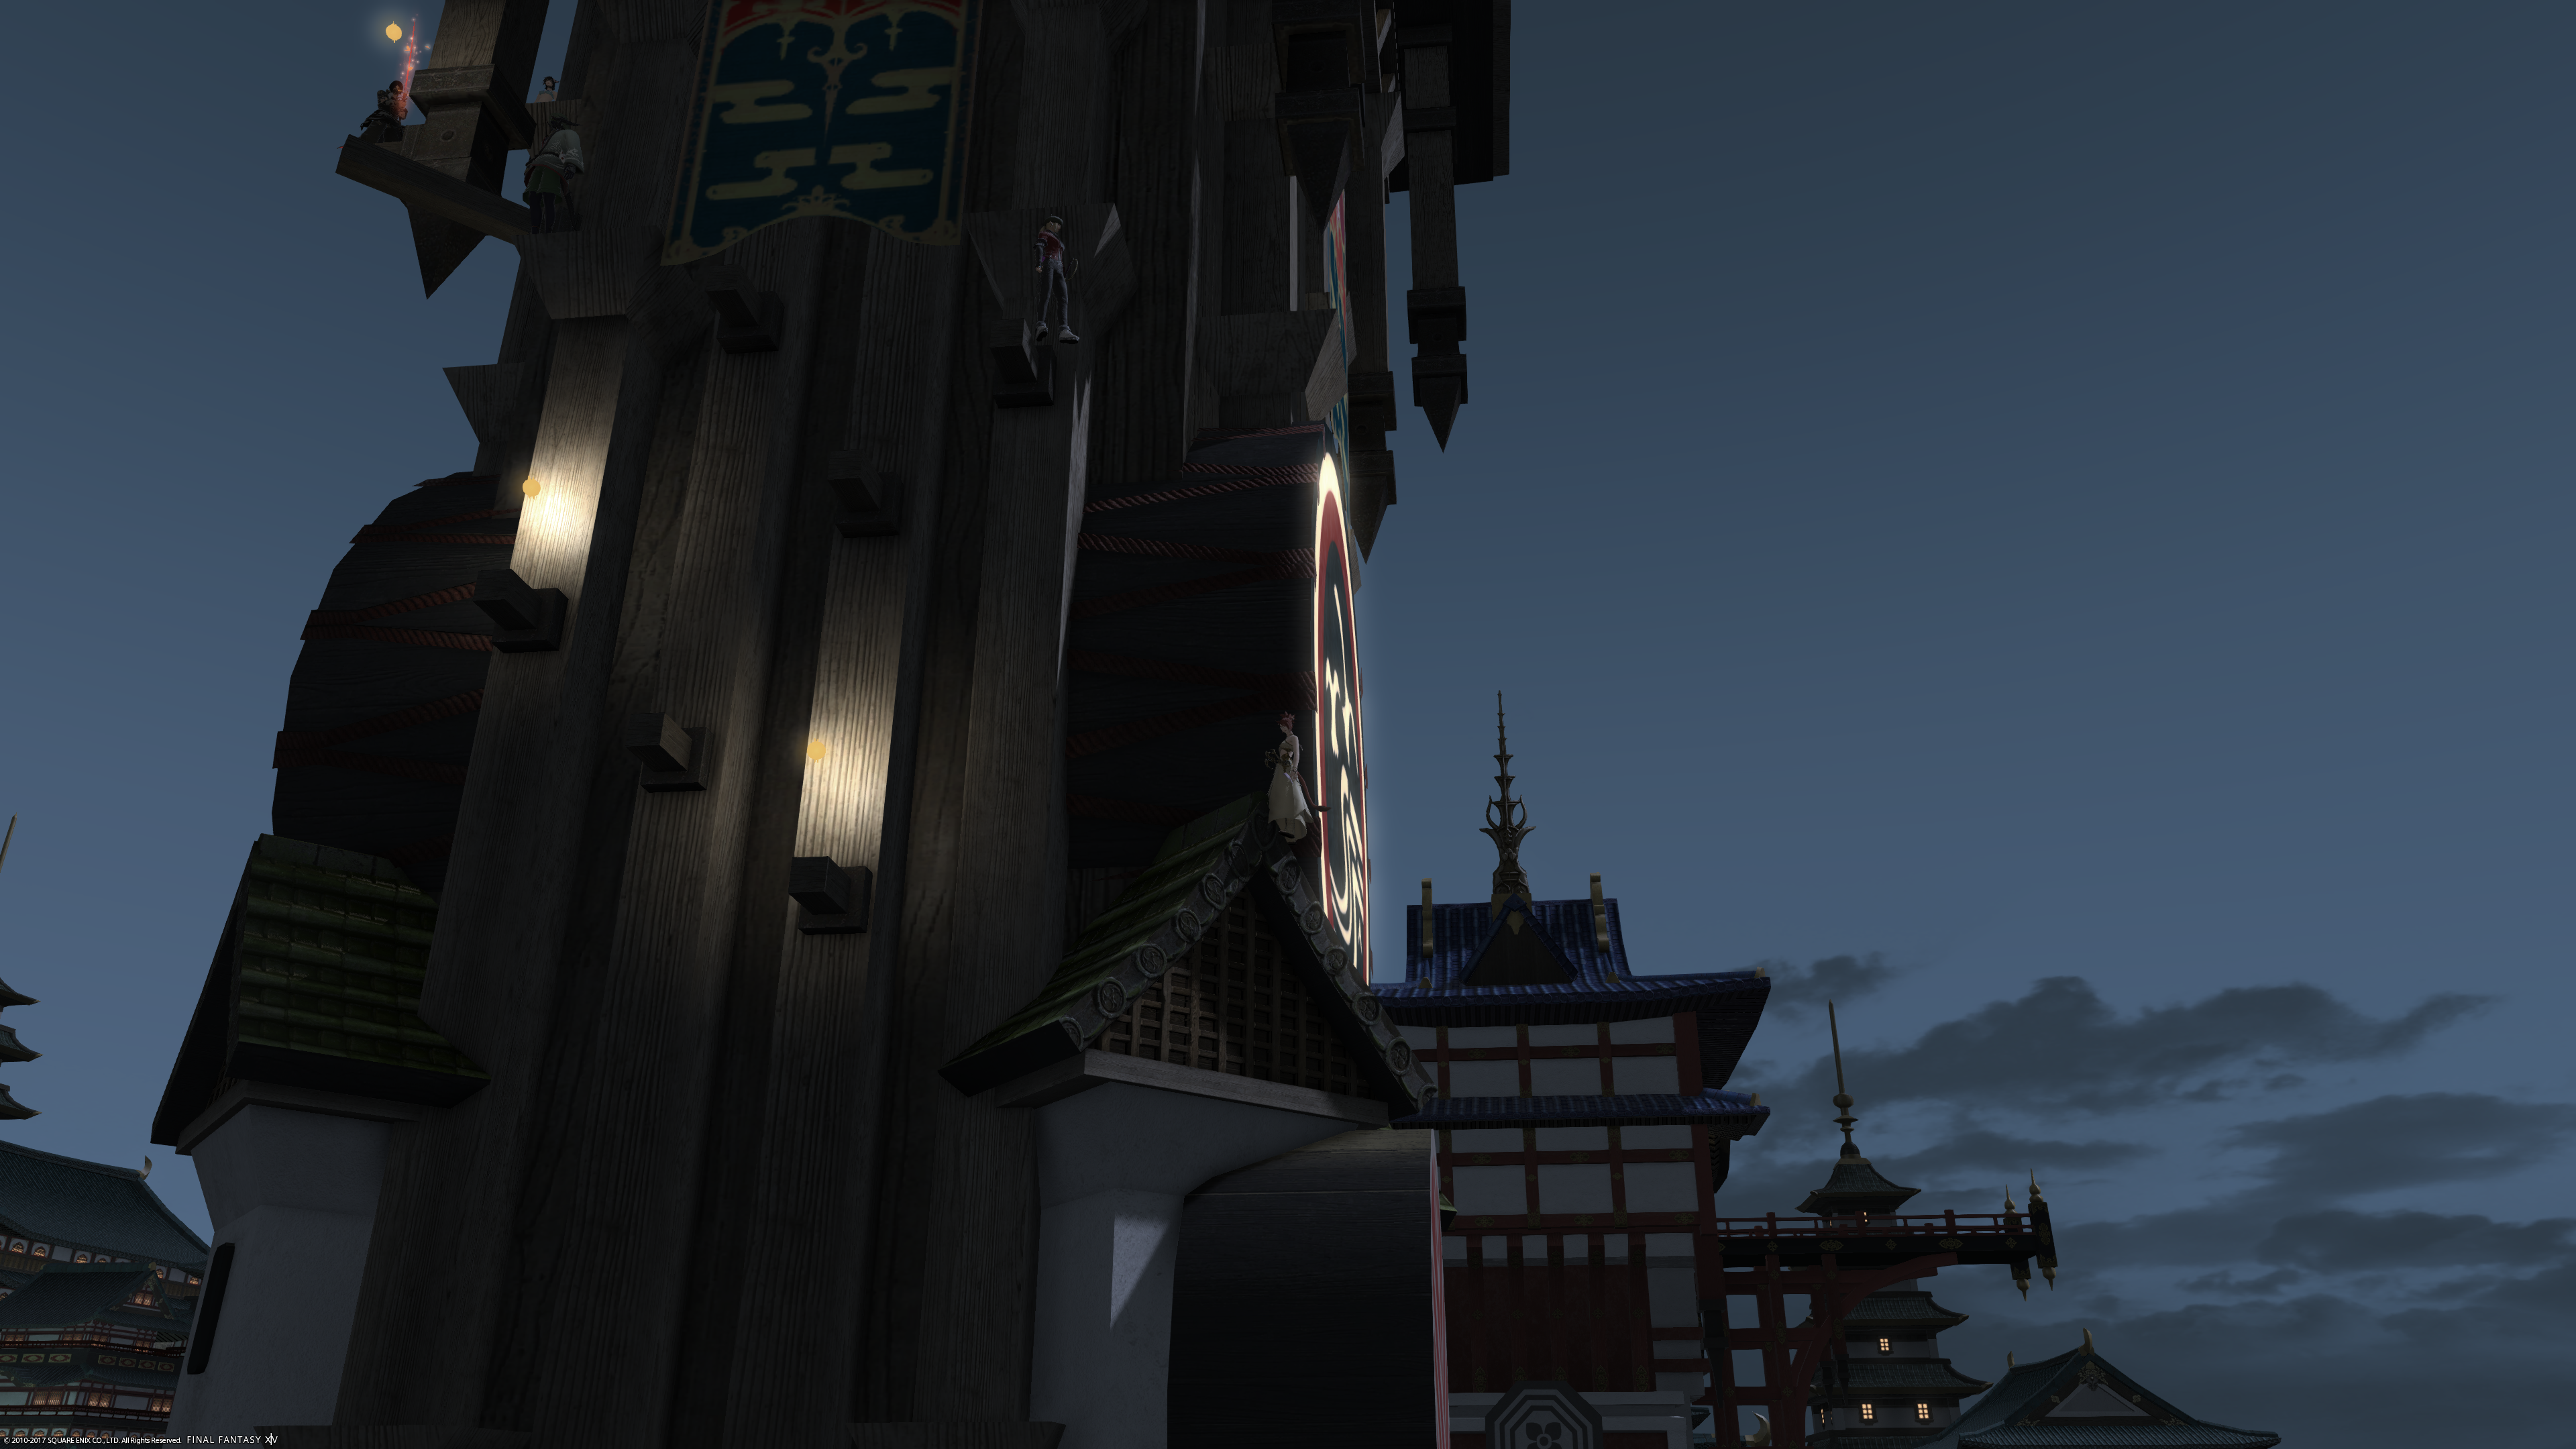
She vividly remembers trying to climb the big tower in Kugane. It was a frustrating experienced that she decided to abandon after a few days of trying. Making precise jumps in the middle of the night with little illumination is hard, which is why she asked her fellow climbers (via /shout) to put up their Wind-up Suns to light up the tower. The community was nice and obliged and soon they had half of the tower lit for climbers and the challenge at hand could continue regardless of sunlight.
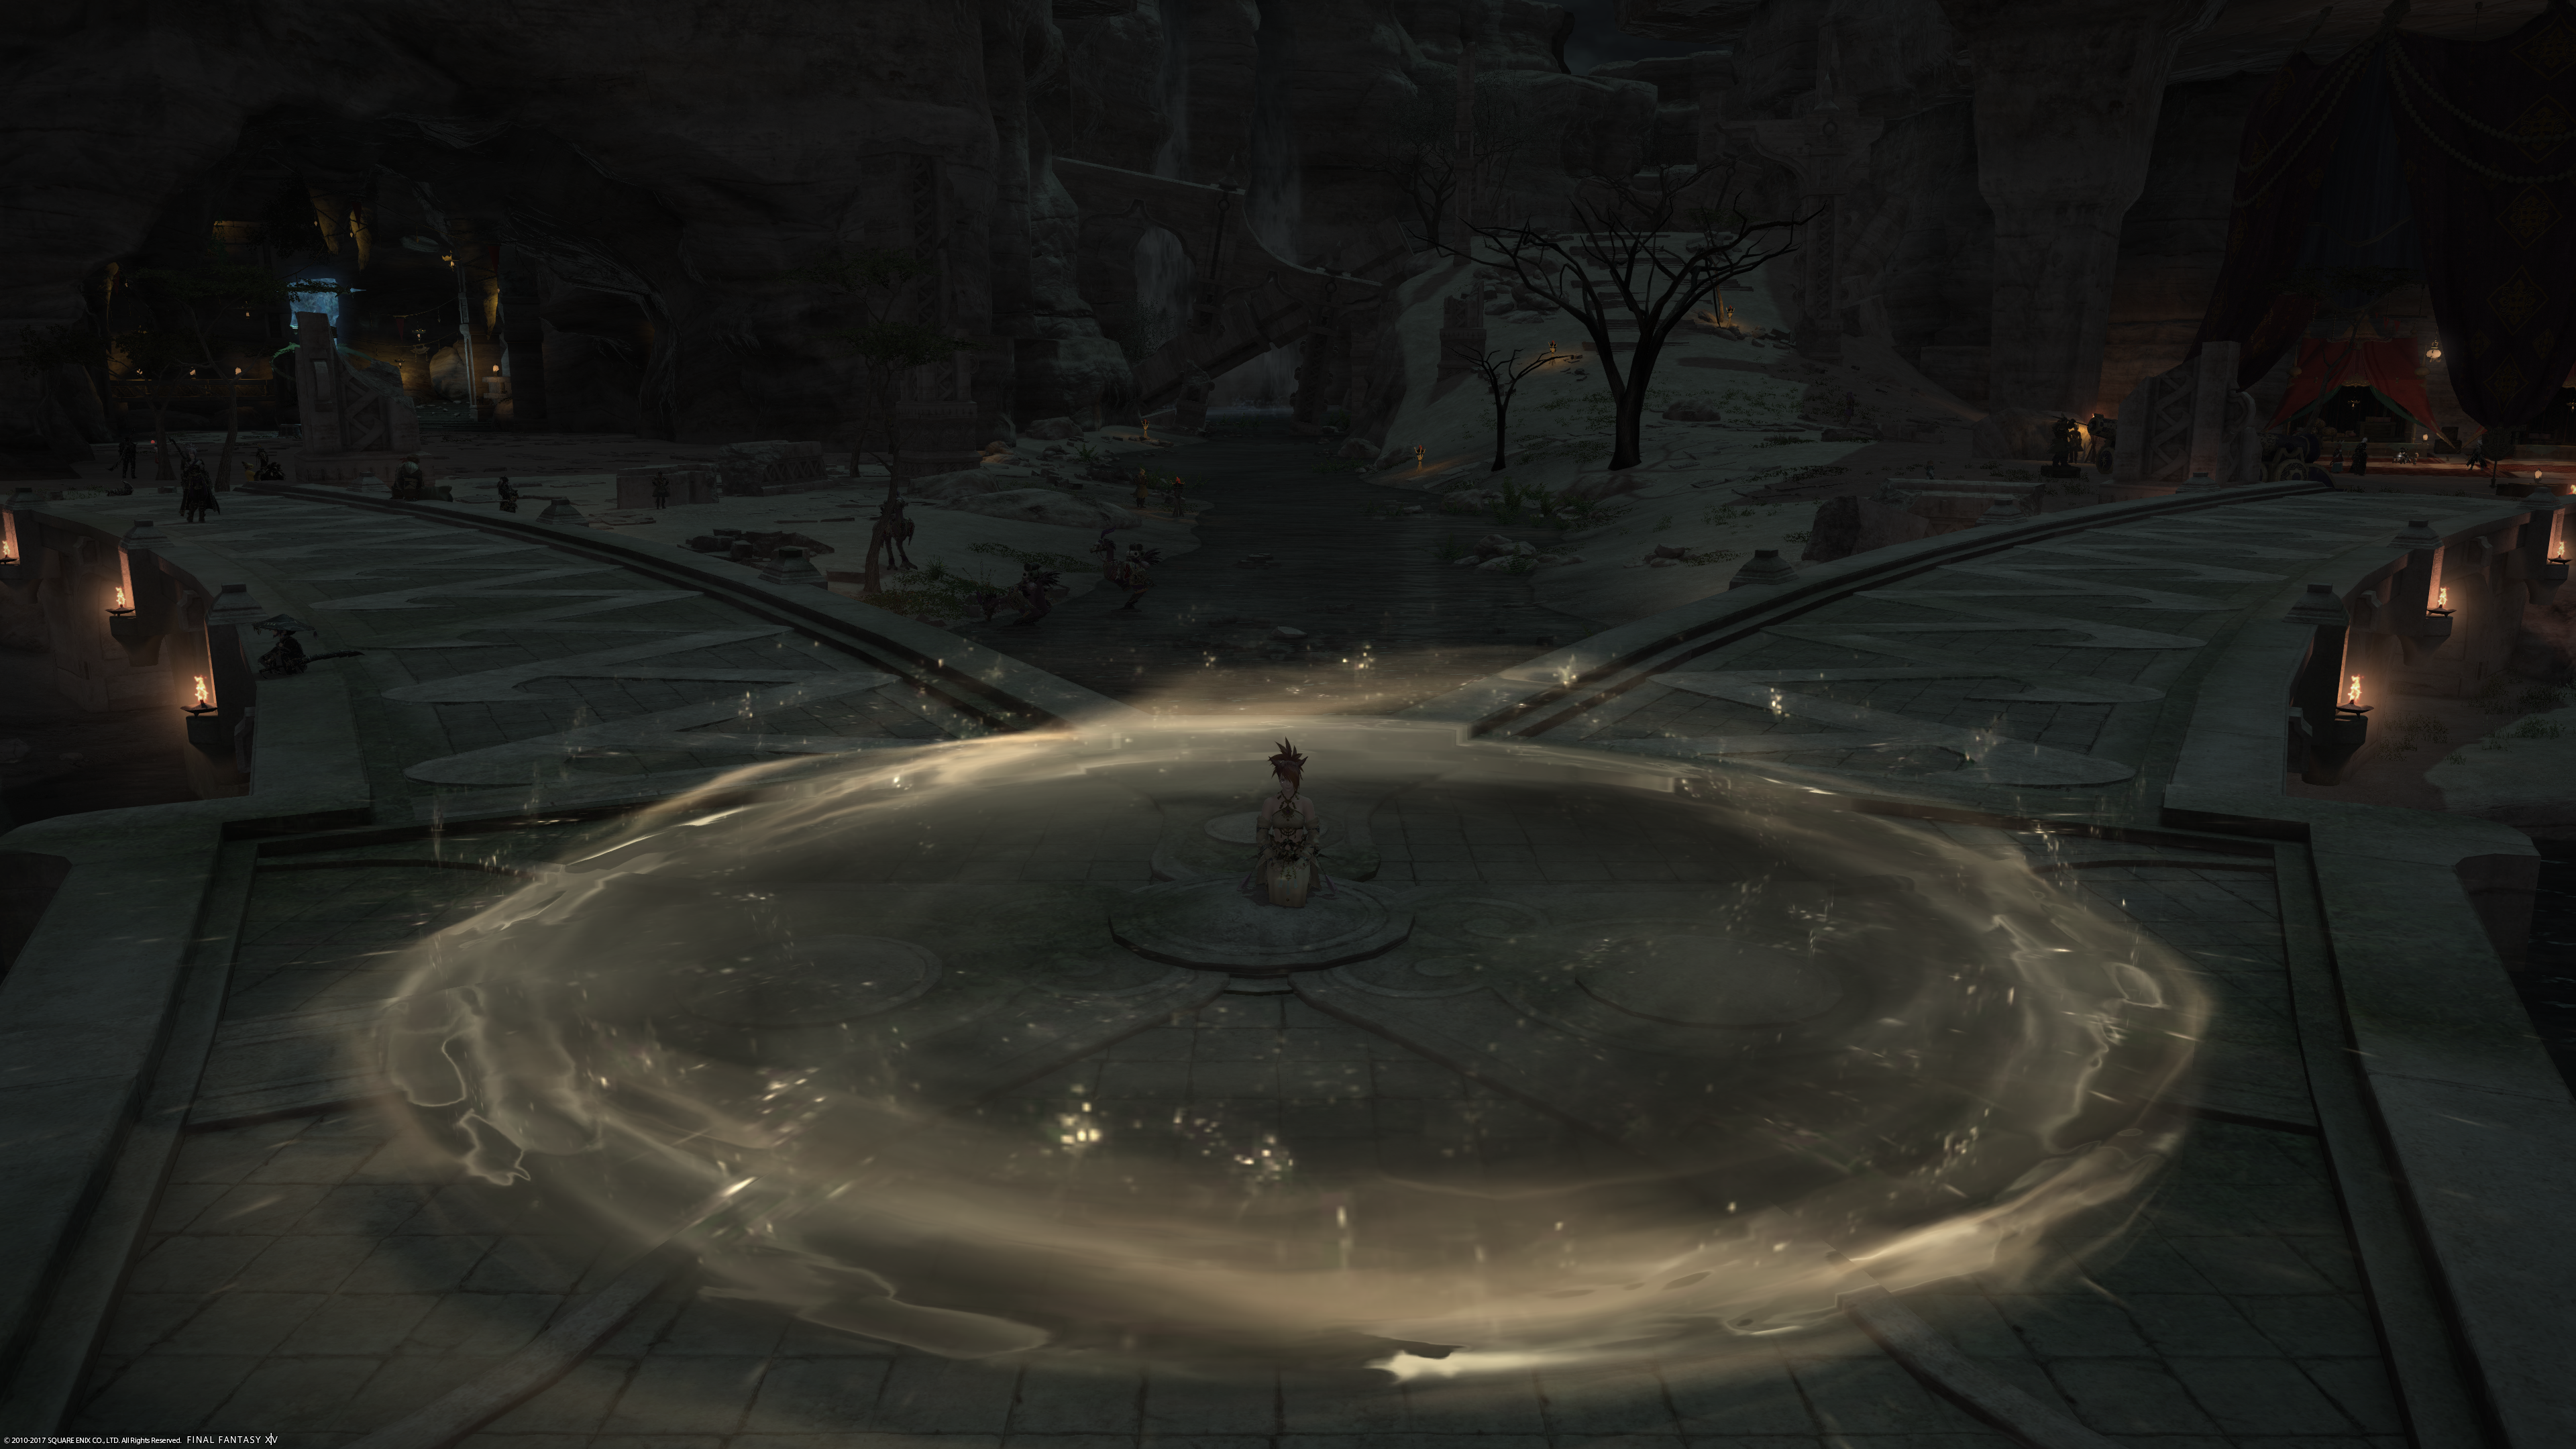
Lately, there has been more work with the FC and Kakysha has been all over Eorzea, helping out where she could. She went with Syn Seraph, Jenji Seraph and Hugo Razgriz to Hax Silverstone’s battle against Susano. She joined Zireael Addan’s battle against Ravana and Hax’s battle against Sri Lakshmi. The greatest memory was helping Selina Unfug getting together a party of seasoned adventurers against Vishap for The Steps of Fate. The Full Party of Selina, Kakysha, Hax, Ianna Stark, Chiyuri Nelhal, Lieselotte Harnisch, Fancydoughnut Drayon and Seraphie Eryniel made short work of the dragon and didn’t even let him reach the third part of the arena. It was by far the best performance of this challenge ever experienced by Kakysha.
Some of this more recent work was due to more active recruitment of new members to Crown, some of it was due to more people joining Kakysha’s linkshell “Kaky’s dungeoneers” which she founded with the intent of helping people find helpful and friendly players for their duties.
bonus: Kakysha’s ninja playstyle
Excerpt from Kakysha’s notes.
The usage of Mug, Armor Crush, Jugulate and Assassinate is pretty self explanatory. The only thing worth adding to Shadow Fang is that Fuma Shuriken is said to be affected by it, but I do not know this for certain.
marking & single target
Before the fight, I prepare with Jin (Yellow) => Chi (Red) => Ten (Blue) to use Huton and be faster. I follow up with Hide since that resets the countdown for Mudra.
Depending on the situation I will open with Shadewalker+ (see macros) after the tank pulls to shift enmity for my following actions onto them.
If we’re up against a single target, I’ll use Mark (see macros) to show my fellow adventurers which enemy will get +10% damage due to vulnerability.
- I follow this up by either Blue => Red => Yellow => Suiton and North Wind if we’re already in battle and there is a likelihood that the target will move.
- If the battle has not yet started or I’m about to Mark a target while no enemy is alive that has ever had enmity on me, I’ll go with Hide.
The mark will then be stabbed using Overwhelm (see macros) and I’ll use as many skills that do a lot of damage while the vulnerability debuff is up, e.g.
- Dream Within a Dream
- Blue => Red => Raiton
- Kassatsu => Blue => Red => Raiton
- Spinning Edge => Gust Slash => Duality => Aeolian Edge
If I’m not pressed for time and the likelihood of Area of Effect (AoE) attacks is low, Ten Chi Jin followed by Blue => Fuma Shuriken, Red => Raiton, Blue => Suiton is a good bet. In a more busy fight I’ll stick with the faster and more mobile Bhavacakra so that the healers have less reason to hate me.
multi target
When fighting multiple targets with a group it is important to realize that enemies who have not attacked me and have never been affected by my actions are unaware I exist. If all who are aware have perished, Hide may be used again without the need for Suiton. As ninja have great damage output against single targets, this might be worth keeping in mind.
If above section does not apply, one may safely use Yellow => Blue => Red => Doton to place an AoE with some duration. If one expects the battle to be relatively short, Yellow => Blue => Futon may be preferred. Futon should also be preferred if one does not trust the tank to keep all enemies safely in one place. Personally, I dislike using Death Blossom as it feels inefficient. Furthermore I dislike hearing the sound of repeated Death Blossom as that gives me the impression my fellow ninjas are choosing the most convenient playstyle using only one button. Hellfrog Medium is also a good choice when up against multiple opponents who are already aware of one.
survival skills
You do get into some hairy situations as an adventurer. I’ll use Shade Shift if I feel that a particularly heavy blow is coming and will use Bloodbath to get some health back while the healer might be busy helping others. If the situation is very dire, I’ll fall back to Second Wind though that one cannot be used very often and will rarely be enough to make a significant difference.
Since Shadewalker cannot be used too often either, I’ll sometimes throw in a Diversion.
I cannot overstate the usefulness of Shukuchi when evading large scale AoEs, especially in raids where there is often lots of space available. Note: Do not use the skill to go through ticking AoEs, e.g. with Hashmal in Rabanastre. Shukuchi can also be used to make up for situations when the party coordination isn’t great, e.g. who attacks which target. I’ll be able to help out with other targets with less travel time after I eliminated my own.
While I’m on the topic of survival - treat Ten Chi Jin as a double edged sword - it can massively increase your damage output but also plays tricks on your mind, e.g. “nah, I’ll want to get the third attack out, the healer will be fine if I get hit by the AoE once”. When in doubt, do not use it.
little used skills
I’ll freely admit that most of the time I forget that Smoke Screen even exists, the same goes for Hyoton. I deliberately do not use Death Blossom since it rarely feels appropriate. Enmity mitigation is easier done by using Shadewalker and then letting loose a burst of damage since the tank should try to get enmity back from non-tank roles anyway.
macros
When I’m writing macros, I try to make sure they fit some criteria. I want my macros to be helpful first, but it’s important to me that they also have some entertainment value (e.g. they have some sass) and that they fit the lore of FFXIV.
Shadewalker+ - shift 80% of enmity generated after action to target of target
/macroicon "Shadewalker"
/grin
/party Now blaming <tt> for everything that's wrong with Eorzea. auto-translate:Shadewalker
/action "Shadewalker" <tt>
Mark - point out which target will get vulnerability debuff
/macroicon Circle enemysign
/marking "Circle" <t>
/party Marking vulnerable target. auto-translate:Trick Attack imminent.
Overwhelm - cast debuff and remove target indicator after effect has ended
/macroicon "Trick Attack"
/action "Trick Attack"
/wait 10
/mk off
Prowess in battle, luck and a trustworthy selection of comrades is what brings you to the deepest chamber of the Lost Canals of Uznair. This was together with Mia Guilharthina.
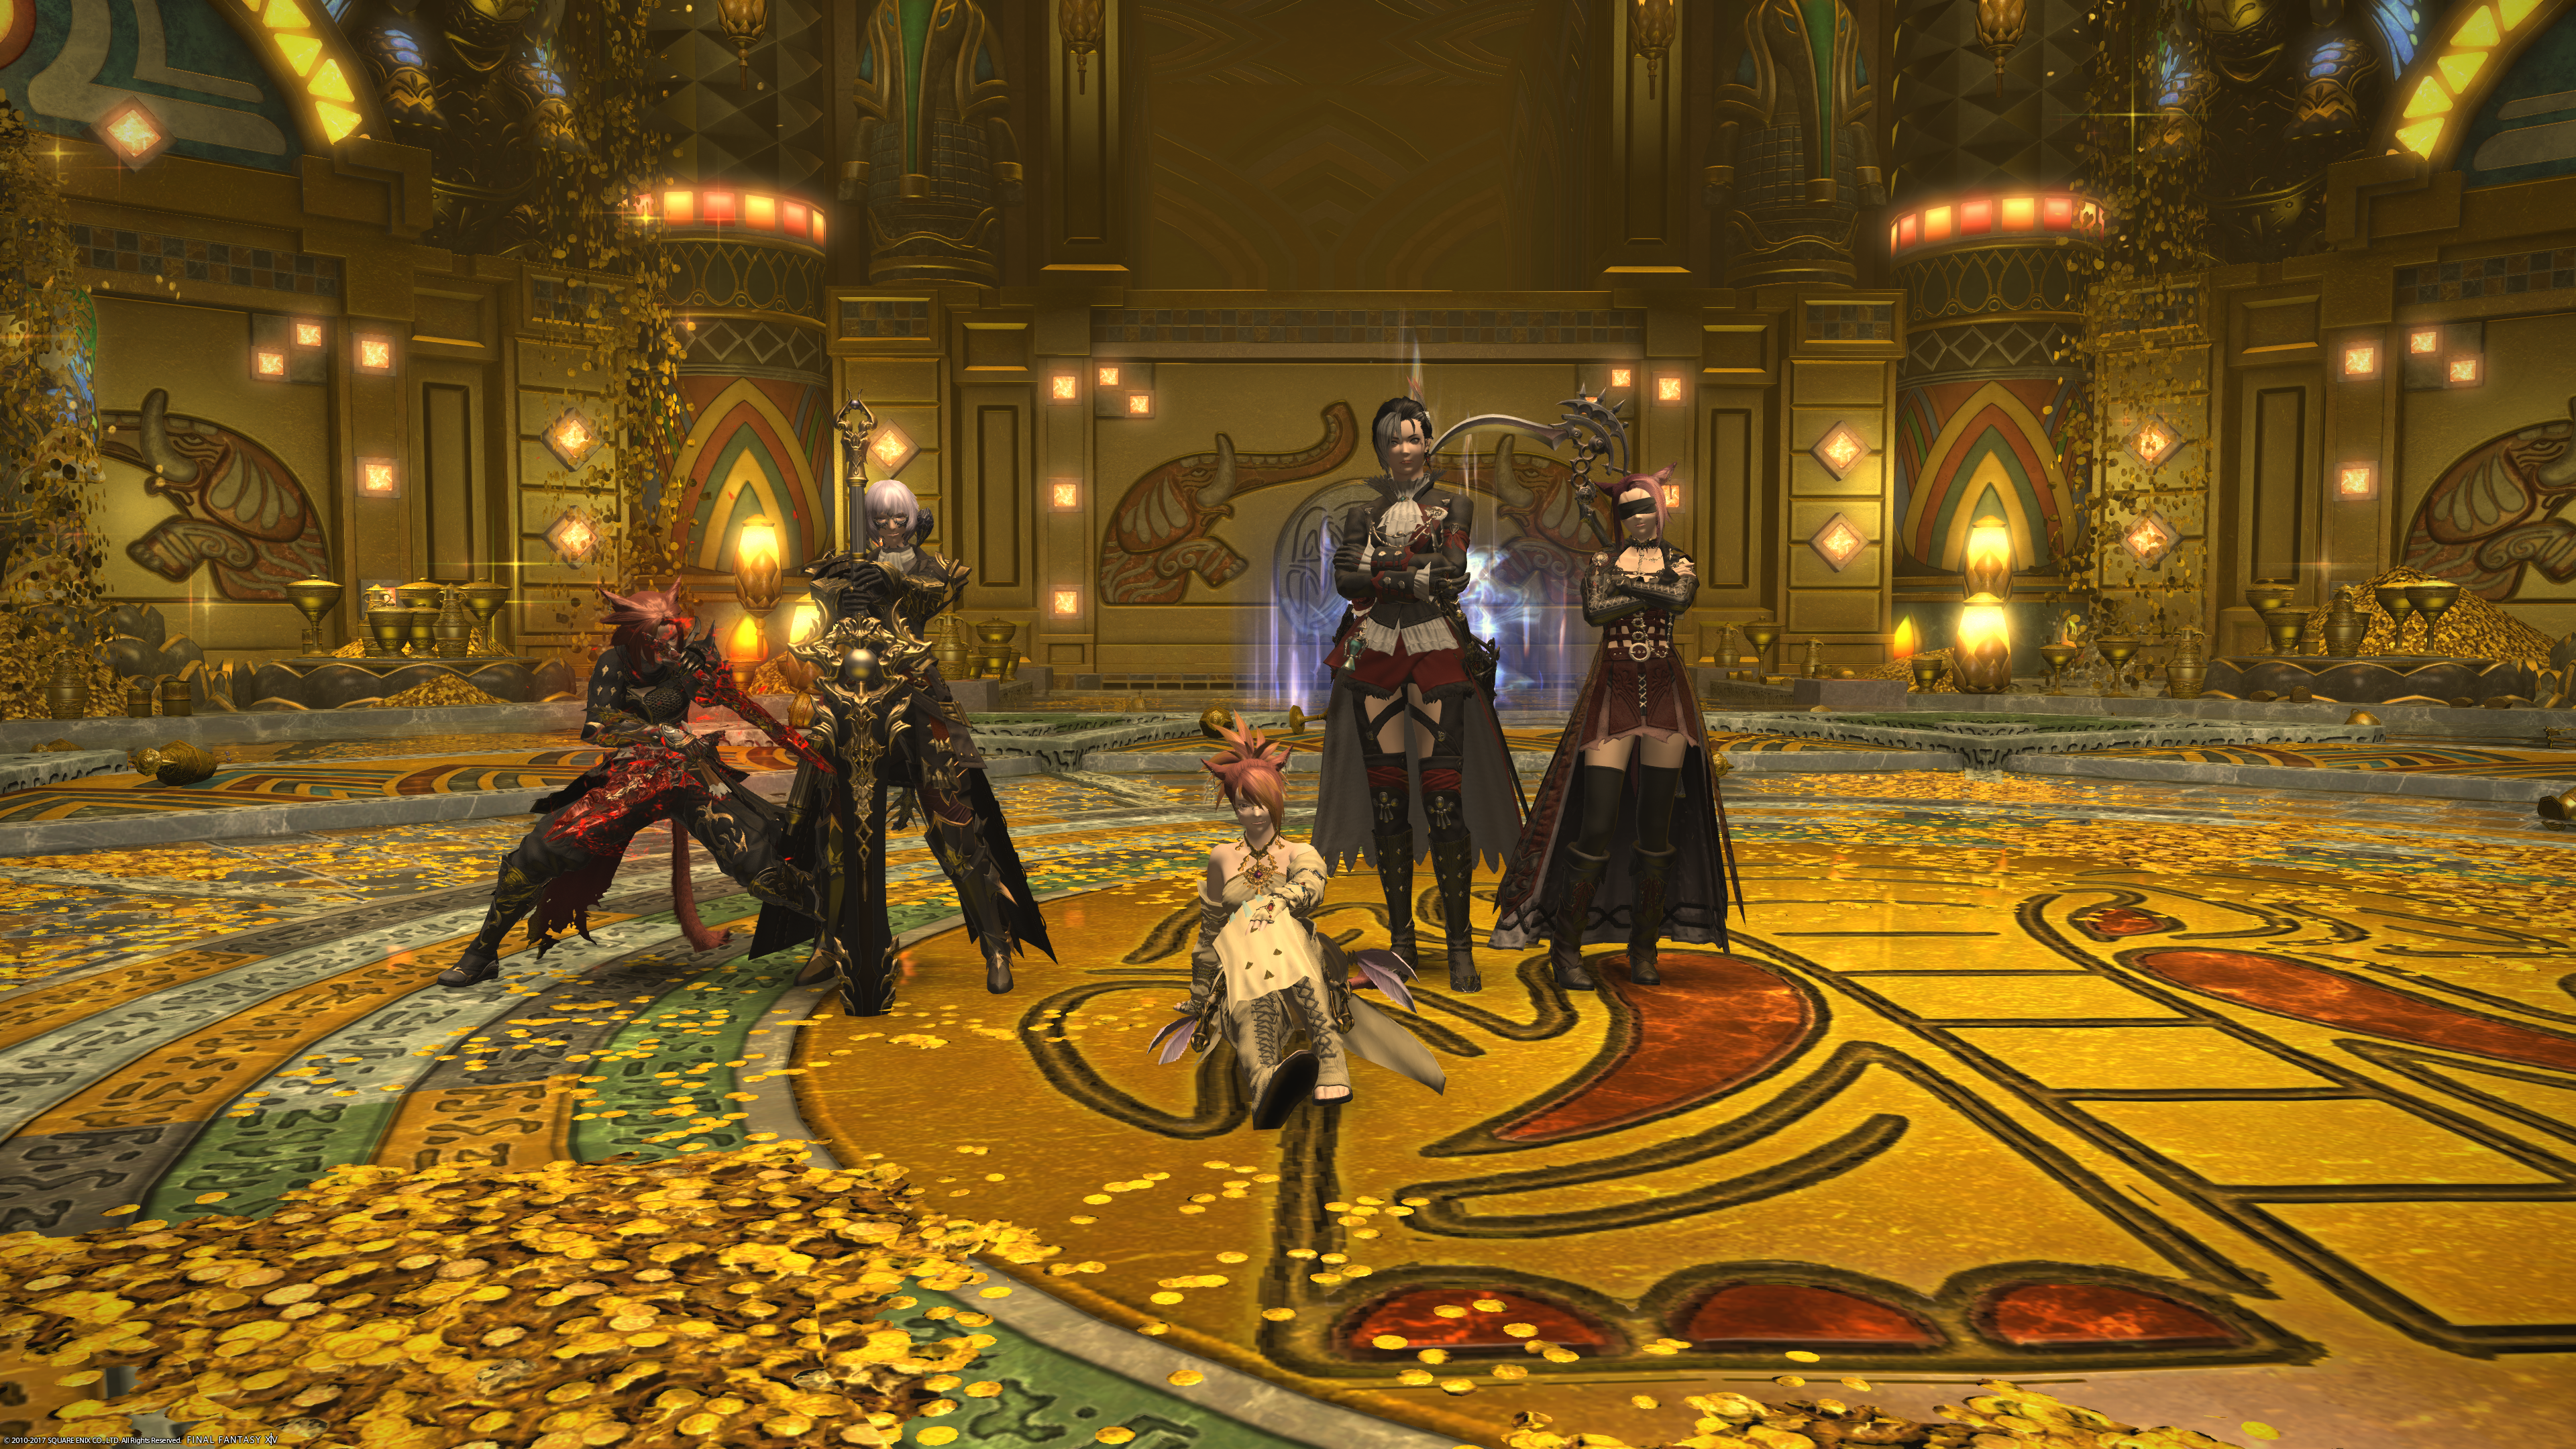
Image credit:
- “Jenji, Deithwen and Kakysha taking a swim” by ~Jenji Seraph